Saturday, December 26, 2015

Smoked Prime Rib

This year I decided to cook prime rib for Christmas dinner.  Given my love for cooking meats on the smoker, I decided to try to smoke the prime rib roast this year.  The roast I prepared was on the smaller size, but since the meat was cooked to a specific temperature, this recipe will work for any size roast.  You just need to calculate the cooking time and have a cook until the desired internal temperature is reached.

After researching, I found the following to be the most common list of average cooking times per pound:

Cooking temperature: 225°F - 250°F
  • 20 min. per lb. for Rare
  • 25 min. per lb. for Medium
  • 30 min. per lb. for Well


Printable Recipe

Ingredients
1 Prime Rib roast of your choosing
Generous amounts of kosher salt and coarse ground pepper

For Au Jus:
1 can beef consommé
Water
Worcestershire sauce, as needed

Directions
Cover all sides of roast with salt and pepper and allow roast to come to room temperature.  Place roast on a rack set inside a sheet pan.  Put a thermometer in the middle of the meat, away from any bone.  Allow to smoke until it reaches an internal temperature of 125°F for rare, 135°F for medium, or 145°F for well. Cover it with foil and let it rest ½ hour before serving.

For Au Jus:
Pour any dripping from sheet pan into a medium skillet.  Add consomme, a can of water and a few dashes of Worcestershire. Turn the burner to medium high and cook for a minute or two, then strain and keep warm. Skim the fat from the jus before serving.

Friday, December 25, 2015

Original Cheesecake

I think I have mentioned before that I am not someone who loves desserts.  I'll have something from time to time but not on a regular basis.  This is I decided to make a cheesecake for Christmas even though I have never made one before.  Thankfully I found a good recipe online that was easy to follow.  The process was not terrible quick, but it was easy.  The results were well worth the effort.


Printable Recipe

Ingredients 

For the crust:
12 whole graham cracker rectangles, finely crushed
5 tablespoons butter, melted

For the cheesecake:
2 pounds cream cheese
1 cup sugar
⅛ teaspoon salt
½ cup sour cream
2 teaspoons lemon juice (optional)
1 teaspoon vanilla extract
3 large eggs
1 large egg yolk

Directions

Preheat the oven to 350°F with a rack in the lower-middle position. Take the blocks of cream cheese out of their boxes and let them warm on the counter while you prepare the crust, about 30 minutes.  Grease springform pan with butter or cooking spray.

Cut two large pieces of foil and lay them on the counter in a cross. Set the springform pan in the middle and fold the edges of the foil up around the sides of the pan. 

Mix graham cracker crumbs and melted butter in a bowl. The mixture should look like wet sand and hold together in a clump when you press it in your fist. If not, add water, one tablespoon at a time, until the mixture holds together. Transfer to the springform pan and press evenly into the bottom.

Place the crust in the oven and bake for 8 to 10 minutes until the crust is  just starting to brown around the edges. Remove from oven and allow the crust cool on a cooling rack while you prepare the filling.

Combine the room temperature cream cheese, sugar, cornstarch, and salt in the bowl of a stand mixer fitted with a paddle attachment. Mix on low speed until the mixture is creamy and no lumps of cream cheese remain. Scrape down the beater and the sides of the bowl with a spatula.  Add the sour cream, lemon juice, and vanilla to the bowl and beat on low speed until combined and creamy. Scrape down the beater and sides of the bowl with a spatula.

With the mixer on low speed, add the eggs and the yolk one at a time. Wait until the previous egg is just barely mixed into the batter before adding the next one. Scrape down the beater and sides of the bowl with a spatula. Stir the batter a few times by hand, being sure to scrape the bottom of the bowl, to make sure everything is incorporated. Pour the batter over the cooled crust and spread it into an even layer against the sides of the pan.

Transfer the pan to a roasting pan or other baking dish big enough to hold it. Bring a few cups of water to a boil and pour the water into the roasting pan, being careful not to splash any water onto the cheesecake. Fill the pan to about an inch, or just below the lowest edge of foil. Bake the cheesecake at 350°F for 50 to 60 minutes. The cheesecake is done when the outer two to three inches look slightly puffed and set, but the inner circle still jiggles when you gently shake the pan.

Turn off the oven and crack the door open. Let the cheesecake cool slowly for one hour.  After an hour, remove the cheesecake from the oven and from the water bath, unwrap the foil, and transfer it to a cooling rack. Run a thin-bladed knife around the edge of the cake to make sure it's not sticking to the sides. Let the cheesecake cool completely on the rack.

Chill the cheesecake, uncovered, for at least four hours in the refrigerator. Take the cheesecake out of the fridge about 30 minutes before you plan to serve. Unmold the cake and top the cheesecake just before serving.

Thursday, December 24, 2015

Carnation Fudge

I must admit, I am not a big desserts or sweets person.  I don't make many desserts during the year, but when I do, it is typically around the holidays.  Fudge is my weakness and I can't make it through the holidays without at least one batch of fudge.  This year I found a simple recipe online and decided to give it a try.  My husband doesn't like nuts so I left those out but did sneak a few into one small strip of the pan once they were starting to cool.


Printable Recipe

Ingredients
½ cups sugar
5 oz. can evaporated milk
2 Tbsp. unsalted butter
¼  tsp. salt
2 cups miniature marshmallows
½ cups Semi-Sweet Chocolate Morsels
½ cup chopped pecans or walnuts (optional)
1 tsp. vanilla extract

Directions
Line 8-inch-square baking pan with wax paper.  Combine sugar, evaporated milk, butter and salt in medium, heavy saucepan. Bring to a full rolling boil over medium heat, stirring constantly. Boil, stirring constantly, for 4 to 5 minutes. Remove from heat.


Stir in marshmallows, morsels, nuts, and vanilla extract. Stir vigorously until marshmallows are melted. Pour into prepared baking pan; refrigerate for 2 hours or until firm. Lift from pan; remove wax paper and cut into small squares.

Wednesday, December 23, 2015

Green Bean Casserole

Green bean casserole is one of my husband's favorite side dishes and is always a welcome addition at our holiday meals.  This is a very simple recipe that tastes great and is easy to make.


Printable Recipe

Ingredients
2 cans french cut green beans, drained
1  can condensed cream of mushroom soup
1 (6 oz) can French fried onions
1 cup shredded Cheddar cheese
Salt/pepper

Directions

Preheat oven to 350°F.  Place green beans, soup, cheese, and half of the french fried onions in a casserole dish and mix well.  Add salt & pepper to taste. 

Bake for 30-35 minutes or until hot in the center. Remove from oven and sprinkle the other half of French fried onions over the top and bake 5 more minutes. 

Tuesday, December 22, 2015

Chicken Pot Pie

Chicken pot pie is one of those great cold weather dishes that warms the soul.  Flakey pie crust filled with vegetables, chicken and a nice thick sauce...what a wonderful combination.  This is an easy recipe to make and is a great way to use leftover chicken or turkey.  Enjoy!


Printable Recipe

Ingredients
2 refrigerated pie crusts - unbaked
1 lb. cooked and shredded chicken
2 cups chicken broth
1 ½ Tbsp. vegetable oil
1 medium onion, finely chopped
3 medium carrots, peeled and sliced (¼" thick)
2 stalks celery, sliced ¼" thick
4 Tablespoons butter
½ cup flour
½ cup whole milk
½ teaspoon ground dried thyme
3 Tbsp. dry sherry
¼ cup frozen peas, thawed
3 Tbsp. minced parsley (fresh)

Directions:
Heat oven to 400°F,  place oven rack in middle position. Place oil in the stock pot, turn heat to medium high. Add the carrots, onion and celery. Sauté until just tender, about 5 minutes. Season to taste with salt and pepper. Place the vegetables into the bowl with the chicken and set aside.

Melt the butter in the now empty stock pot over medium heat. Once melted, add the flour and cook 1 minute.
Whisk in the chicken broth, milk and thyme. Bring to a simmer, continuing to simmer until sauce thickens (about 1 min.). Season with salt and pepper, stir in the sherry.


Pour the sauce over the chicken-vegetables mixture, stir well. Stir in the peas and parsley.  Line a large casserole dish with one of the pie crusts which has been rolled to fit the pan.   Pour the chicken mixture into the pan and top with second crust.  Make four small slits in the top of the pie crust.  Bake in preheated oven until pie crust is golden brown and the filling is bubbly, about 30 minutes.

Monday, December 21, 2015

Easy Chicken Enchiladas

My family loves Mexican food and chicken enchiladas are always a big hit.  This is a easy recipe that produces tasty results every time.  You can use left over chicken or quickly bake a few chicken breasts to use in this recipe.  The recipe calls for fat-free sour cream and you could also use less cheese if you wanted to cut even more calories.  Enjoy!


Printable Recipe

Ingredients
3-4 cups cooked Chicken, shredded or cut into small chunks
4 oz. can chopped Mild Green Chiles
16 oz. fat-free Sour Cream
1 can Cream of Chicken soup
2 cups shredded Mexican blend cheese
10 flour Tortillas

Preparation
To make sauce, mix green chiles, ¾ of sour cream (save the rest for garnish) and soup. Take ¼ of sauce mixture and spread in bottom of greased 13x9" baking pan.  Then take approximately ¼ of this mixture and mix with the chicken. Fill flour tortillas with a scoop of chicken mixture and some cheese. Roll enchilada style and place in pan.

Cover enchiladas with remaining sauce and cover baking pan with foil. Bake at 350°F for approximately 30-35 minutes.

Remove foil, sprinkle with remaining cheese and bake another 5 minutes.


Sunday, December 20, 2015

Chicken Tamales

On Thanksgiving day, my sister and I decided to spend the afternoon making tamales.  Now, I don't know about you, but the thought of spending even more time on Thanksgiving cooking was not all that appealing to me.  I decided to go ahead and make the filling in advance and prepare the masa just before our tamale party began.  I found this recipe online and it was a winner.  Everyone in the family enjoyed them without complaint.


Printable Recipe

Ingredients
1 (8 ounce) packages dried corn husks

Filling:
1 lb tomatillo, husked and rinsed ( 10-12 medium)
2-3 fresh green chili pepper, stemmed and seeded (Anaheim, Serrano, or jalapeños - choose your heat level)
4 large garlic cloves, peeled
½ tablespoons olive oil
2 cups chicken broth
4 cups cooked chicken, shredded
 cup roughly chopped fresh cilantro
2 tsp. salt

Batter:
10 oz lard (or vegetable shortening)
½ teaspoons baking powder
½ cups dried masa harina for tamales
¼ cups hot water
1  to 1 ½ cup chicken broth
2 ½ tsp. salt
½ tsp. chili powder


Directions

Cover corn husks with very hot water, weight with a plate to keep them submerged, and let stand for a couple of hours until the husks are pliable.

Filling:

On a baking sheet, roast the tomatillos about 4 inches below a very hot broiler until soft and blackened in spots, about 5 minutes; flip them over and roast the other side. Cool and transfer to a food processor or blender. Add the chiles and garlic and process to a smooth puree. Heat the oil in a medium-size saucepan over medium high. When quite hot, add the puree all at once and stir until noticeably thicker and darker, about 5 minutes. (You may wish to cover the pot with a splatter screen) Add 2 cups of the broth and simmer over medium-high heat until thick enough to coat a spoon quite heavily, at least 10 minutes.  Taste and season with salt, usually about 2 teaspoons. Stir in the chicken and cilantro; cool completely.

Batter:

With an electric mixer on medium-high speed, beat the lard or shortening with salt, chili powder, and the baking powder until light in texture, about 1 minute. Continue beating as you add the masa and water in three additions. Reduce the speed to medium-low and add 1 cup of the remaining broth. Continue beating for another minute or so. Beat in enough of the remaining ½ cup of broth to give the mixture the consistency of soft (not runny) cake batter; it should hold its shape in a spoon. Taste the batter and season with additional salt if needed.

Assembly:

To assemble each tamale, spread 2 Tbsps. of the batter on the center of the corn husk.  Place about 1 Tbsp. meat mixture in the middle of the batter.  Pick up the two long sides of the cornhusk and bring them together (this will cause the batter to surround the filling).  Fold up the empty 1 ½-inch section of the husk  and secure it in place by loosely tying one of the strings or strips of husk around the tamale. Note: I used Alton Brown's suggestion to bundle the tamales in groups of three and tie with kitchen twine vs tying each one.

As they’re made, stand the tamales on their folded bottoms in the prepared steamer. Don’t tie the tamales too tightly or pack them too closely in the steamer. They need room to expand.Add water to steamer pot just below the basket.  Bring water to boil and reduce heat to low.  Cover and steam until the dough is firm and pulls away easily from the husk, 1 to 1 1/2 hours.

Wednesday, December 16, 2015

Lasagna

I love lasagna but rarely make it because it's a time consuming process.  If you search the internet, you are surely to find a recipe which states that their lasagna is the best lasagna ever made.  I definitely won't go that far, but this is a great tasting lasagna with simple ingredients.  It's very kid-friendly and can be made ahead of time and cooked on a busy week night.  Enjoy!


Printable recipe

Ingredients
1 lb. sweet Italian sausage
1 lb. lean ground beef
½ cup onion, finely diced
2 cloves garlic, crushed
1 (28 ounce) can crushed tomatoes
2 (6 ounce) cans tomato paste
2 (6.5 ounce) cans canned tomato sauce
½ cup water
1 Tbsp. white sugar
1 ½ tsp. dried basil
1 tsp. Italian seasoning
1 Tbsp. salt
½  tsp. black pepper
4 Tbsps. chopped fresh parsley (divided)
12 lasagna noodles
16 oz. ricotta cheese
1 egg
½ tsp. salt
¾ lbs. mozzarella cheese, sliced
¾ cup Parmesan cheese, grated

Directions
In a Dutch oven over medium heat, cook sausage, ground beef, onion, and garlic until meat is browned. Drain.  Stir in crushed tomatoes, tomato paste, tomato sauce, and water. Add sugar, basil, Italian seasoning, 1 Tbsp. salt, pepper, 2 Tbsp. parsley and mix well. Simmer, covered, for an hour, stirring occasionally.

Cook lasagna noodles according to package directions. Drain noodles, and rinse with cold water. In a mixing bowl, combine ricotta cheese with egg, remaining parsley, and ½ tsp. salt.

Preheat oven to 375°F.

To assemble lasagna, spread 1 ½ cups of meat sauce in the bottom of a 9x13 inch baking dish. Arrange 6 noodles lengthwise over meat sauce. Spread ½ of the ricotta cheese mixture over noodles. Top with ⅓ of mozzarella cheese slices and ¼ cup Parmesan cheese. Spread 1 ½ cups meat sauce over mozzarella. Add another layer of noodles, ricotta, mozzarella and Parmesan cheese.  Add remaining meat sauce, then top with remaining mozzarella and Parmesan cheese. Cover with foil: to prevent sticking, either spray foil with cooking spray.

Bake in preheated oven for 25 minutes. Remove foil, and bake an additional 25 minutes. Cool for 15 minutes before serving.

Wednesday, December 2, 2015

Crockpot Broccoli Cheese Soup

Rain.  That's what has been in our weather forecast for the past few days.  Lots and lots of cold rain.  When it's cold and wet I love to have a nice hot bowl of soup or chili.  When I think of soup, my favorite is broccoli cheddar.  This is an easy crockpot recipe and even my kids enjoy this soup.  We have it with honey cornbread muffins and together they make a great meal.


Printable Recipe

Ingredients
¼ cup butter
¼ cup onion, finely chopped
⅔ cup flour
32 oz. box chicken broth
¾ teaspoon salt
½ cup celery, finely chopped
¾ cup carrot, finely chopped
1 (16-ounce) bag frozen broccoli - rinsed with hot tap water
1 lb. Velveeta cheese, cubed
2 cups half-and-half


Directions
Melt butter in small skillet over medium heat. Add onion and sauté until glossy. Pour onion and butter into crock-pot.

Add flour slowly to crock pot stirring with a whisk. Pour in chicken broth and whisk until smooth. Add salt, celery, carrots, and broccoli. Cook low for 6-7 hours or high for 3-4 hours.  Using either an immersion blender or traditional blender, blend soup to the desired consistency.

Add cheese cubes and stir until melted. Pour in half and half, stirring to blend. Cover and continue to cook for an additional 30 minutes. 

Tuesday, December 1, 2015

Honey Cornbread Muffins

Corn muffins are a staple in our house during the winter.  Anytime I make soup, you can bet corn muffins will be close by.  In the past when time is crunched, I must admit that I turn to the box mix to whip up  a quick batch.  This recipe changes that because it is just as quick and easy and the results were very tasty.  This recipe is from the Neely's, and like their other recipes that I have tried, it did not disappoint.


Printable Recipe

Ingredients
1 cup cornmeal
1 cup all-purpose flour
1 Tbsp baking powder
¼ cup granulated sugar
1 tsp salt
1 cup milk
2 large eggs
½ stick butter, melted
¼ cup honey

Directions
Preheat oven to 400°F.

Into a large bowl, mix the cornmeal, flour, baking powder, sugar, and salt. In another bowl, whisk together the whole milk, eggs, butter, and honey. Add the wet to the dry ingredients and stir until just mixed.

Place paper liners in a 12 cup muffin tin. Evenly divide the cornbread mixture into the muffin pan (I use an ice cream scoop to make this easier). Bake for 15 minutes, until golden brown.

Friday, November 27, 2015

Dry Brined Spatchcock Smoked Turkey

For this year's Thanksgiving turkey, I decided to try something different and spatchcock or butterfly our bird.  Once that decision was made, it was then time to find a suitable recipe and I chose Alton Brown's Dry Brined Turkey.  His recipe calls for the turkey to be dry brined and sit uncovered in the refrigerator for 4 days before cooking.  I decided to only let my bird sit for 2 days due to space constraints.  I also chose to leave the Allspice out of the dry brine recipe.

On Thanksgiving day, I took the turkey out and allowed it to sit for about an hour while I prepped the smoker.  While the smoker was coming up to temperature, I took the opportunity to rub softened herb butter between the skin and the meat of the turkey. 

Once the smoker's temperature stabilized I smoked the turkey until the breast reached 165.  Once it was finished I placed it in a foil pan so I could easily transport it to our dinner destination.  The turkey was tender, juicy and very tasty.  I will definitely make this recipe again!

Photo Disclaimer:  Due to the hectic nature of Thanksgiving meal preparation, I did not get a money shot of the Turkey.


Printable Recipe

Ingredients
3 ½ Tbsps. kosher salt
1 ½ tsp. sage
1 ½ tsp. thyme
1 ¼ tsp. black pepper
6 Tbsp. herb butter, softened
13 to 14 pound whole turkey, neck and giblets removed

Directions
Combine all spices in a small bowl and set aside.

Set the turkey, breast-side down, on a large cutting board. Use an electric knife or heavy-duty kitchen shears to cut along  one side of the backbone. Turn the bird around and cut along the other side of the spine. Trim any fat pockets or excess skin found inside the turkey. Turn the turkey breast-side up and use the heel of your hands to press down on both breasts, until the bird has flattened slightly.

Apply the rub on both sides of the turkey. Place the turkey on a parchment paper lined half sheet pan, breast-side up with legs running with the long side of the pan. Store, uncovered, in the refrigerator for several days.

Once you are ready to cook, remove the turkey from the refrigerator and leave at room temperature for about an hour.  While you are waiting, carefully loosen the skin and rub herb butter directly on the turkey meat underneath the skin all over. Massage the skin from the outside until the butter is distributed in an even layer.

Heat smoker or oven to 425°F.

Place the turkey on a rack set into a half sheet pan. Cook for 30 minutes, then reduce the heat to 350°F. Continue to smoke/roast the turkey until a probe thermometer inserted into the thickest part of the breast registers 165°F.  Remove from smoker/oven and allow to rest for about 30 minutes before carving.

Tuesday, November 24, 2015

Sweet Tea

You can't have Southern BBQ without an ice cold glass of sweet tea.  This post is for anyone who wants a quick and easy way to make iced tea.  Despite my Southern roots, I prefer a mild tea that is slightly sweetened vs a strong, syrupy sweet tea.  Feel free to adjust the amount of sugar to your taste or let the tea brew longer for a stronger flavor.


I use a 1 quart glass measuring cup to make my tea.  If you don't have one handy you can brew the tea in a saucepan on the stovetop. Just be careful not to bring it to a rolling boil.

Printable Recipe

Ingredients
4 cups water
2 family-size tea bags
2/3 cup Sugar
Additional water to fill one gallon pitcher

Directions
Fill 1 quart glass measuring cup with 4 cups water.  Add tea bags, placing the strings outside the cup.


Place in microwave and heat for 5 minutes to brew.  After 2 minutes, I usually pause the microwave and dunk the tea bags a few times.  While tea is brewing, add sugar to one gallon pitcher.

After 5 minutes, carefully remove the measuring cup from the microwave.


Slowly pour brewed tea into the pitcher while holding onto the tea bag strings.  Refill measuring up, allowing water to run over the tea bags as you fill the cup.  Pour into the pitcher and repeat one more time.  Stir tea, then add additional water and/or ice to fill the pitcher.  Serve.


Monday, November 23, 2015

Teriyaki Beef Jerky

Today I decided to break out of my normal beef jerky routine and try a new recipe.  I found this one on a blog site and gave it a shot.  The results were a mild teriyaki flavor that was quite tasty.  I will definitely make this recipe again.


Printable Recipe

Ingredients
½ cup soy sauce
¼ cup Worcestershire sauce
2 teaspoons sesame oil
½ cup orange juice
2 tablespoons honey
2 tablespoons ginger, peeled and minced
¼ cup scallions, chopped
2 cloves garlic, minced
3 lbs. of lean beef

Directions
Combine the marinade ingredients in a large bowl or Ziploc bag and refrigerate while you prepare the beef.

Trim all the fat, gristle, and silver skin from the meat. Slice into thin strips (1/8" to 1/4" thick), against the grain. Add meat to the marinade and mix well. Store the meat in the fridge for about 12-24 hrs.

Preheat the smoker to 180°F  and allow to temperature to stabilize.  Remove the beef slices from the marinade and spread the strips in a single layer on a jerky rack. Make sure the beef strips don't overlap and have a little space between them to enable good air circulation.

Smoke the beef jerky for 3 to 5 hours or until preferred texture is achieved (Thicker strips may take longer).

Wednesday, November 18, 2015

Chicken with Cajun Cream Sauce

Let me start by saying this chicken is not spicy if prepared as the recipe is written.  With that said, you can definitely bump up the spice level by adding a little cayenne or adjusting the other spice amounts.  My goal was a nice balance in flavors and this recipe accomplishes that.  I served it with noodles (basically a spiced up Fettuccine Alfredo) but you can pair the chicken with the side of your choosing.


Printable Recipe

Ingredients
4 boneless, skinless chicken breasts (pounded to equal thickness)
2 tsp garlic powder
1 tsp chili powder
1 tsp onion powder
½ tsp salt
½ tsp white pepper
½ stick butter, divided
2 cups heavy cream

Directions
Combine salt, chili powder, onion powder, white pepper, and garlic powder in a small bowl.  Sprinkle over both sides of chicken breasts. Reserve any unused spice mixture until later.

Melt 2 tablespoons of the butter in a large sauté  pan, then cook the chicken breasts over medium heat about 7 to 8 minutes, turning them once. Pour the cream into the pan and reduce the heat to low.
Simmer for several minutes, stirring, until the sauce thickens, then fold in the remaining 2 tablespoons butter and any remaining spice mixture.  Stir to blend and adjust taste as needed.  Serve hot.

Monday, November 16, 2015

Easy Apple Crisp

Several people have asked me for apple recipes so here is another recipe for Apple Crisp.  I must admit that I can't remember exactly who gave me this recipe, but it's not my own. This recipe is very easy to make and you probably have most of the ingredients on hand.  The crust has a nice buttery  and sweet flavor and it's perfect with a scoop of ice cream!


Printable Recipe

Ingredients:
½ cups apples-peeled, cored, & sliced.
1 cup sifted all-purpose flour
1 cup white sugar
½ tsp. ground cinnamon
¼ tsp. salt
½ cup butter, softened


Directions:
Preheat oven to 375°F. Lightly grease an 8-inch square baking dish. Arrange apple slices evenly in prepared baking dish. Sift flour, sugar, cinnamon, & salt in a bowl. Cut in butter using a fork until mixture resembles coarse cornmeal; sprinkle over apples.  Bake in preheated oven until topping is golden, 40 to 45 minutes. Cool slightly before serving.

Friday, November 13, 2015

Coconut Pecan Praline No Bake Cookies

Last week I happened to stop by a craft fair at a local church and couldn't pass up some of the yummy items at the baked good table.  I bought a small bag of coconut pecan pralines.  The bag contained two of the best tasting treats so, of course, I had to try to make them myself.

After searching the internet I happened upon a blog site which detailed these exact cookies.  The process reminds me of making chocolate oatmeal no bake cookies but using coconut and pecans.  They were quick and easy to make, but the hardest part was having to wait for them to cool and firm up.  Enjoy!


Printable Recipe

Ingredients
2 ½ cups granulated sugar
½ cup evaporated milk
½ cup corn syrup
1 stick unsalted butter*
1 tsp vanilla extract
¼ tsp salt*
2 ½ cups pecans, chopped
2 cups sweetened shredded coconut

(*Note:  You can use salted butter and then omit the salt)

Directions
Combine coconut and pecans in a medium-sized bowl and set aside.  In a saucepan over medium-high heat, combine sugar, evaporated milk, corn syrup, and butter.  Cook until the mixture comes to a rolling boil, stirring constantly, and allow to cook for 3 minutes.  Remove from heat and stir in vanilla, and coconut/pecan mixture.  Stir for 3-4 minutes as mixture starts to cool and thicken.  Drop by large spoonfuls onto parchment (or wax) paper.  Allow to cool completely, approximately 1 - 1½ hours.

Thursday, November 12, 2015

Homemade Pork Tamales

For me, there are a few things that have been on my culinary bucket list for a while now and I have a deep desire to learn to cook them.  Tamales is one of those things.  This week I found myself with a day off for Veteran's day and since the kids were in school it was the perfect time to give these a try.  After watching several videos (Alton Brown's "Tamales Never Die" for one) and searching high and low for a recipe, I was ready to go.  The recipe I found (Traditional Tamales) made a rather large batch  so I decided to scale it down to fit my needs.  This variation made 32 tamales for me but your numbers may vary depending on how thick you spread the dough on the husks and how much filling you add to each tamale.  To me it was the perfect amount to have some to eat and some to freeze but not too many.  I will definitely make these again and experiment with different filling recipes.


Printable Recipe

Ingredients
2 lbs pork shoulder or pork butt, trimmed and cut into 1" cubes
6 cups water
½ medium onion, chopped
2 garlic cloves, minced
2 tsps. salt
2 cups red chili sauce (see recipe below)
⅓ cup lard or shortening
3 cups masa harina
¾ tsp baking powder
6 oz bag dried corn husks (You won't use the entire bag)
Kitchen Twine (optional)

Directions
In a 5 qt Dutch oven, bring pork, water, onion, garlic and 1 tsp salt to boil. Simmer covered, about 2 hours or until meat is very tender.

While you wait, make Red Sauce (see recipe below). Soak approx. 40 corn husks in warm water for at least 45 minutes; rinse to remove any corn silk and drain well.

When meat is done, remove meat from broth and allow both meat and broth to cool. Shred the meat using 2 forks, discarding fat. Strain the pork broth and reserve 3 cups.  In a large sauce pan, heat the red chili sauce and add meat; simmer, covered for 10 minutes.


To make dough, beat lard/shortening on medium speed in a large bowl for 1 minute.  In a separate bowl, stir together masa harina, baking powder and 1 teaspoons salt.  Alternately add masa harina mixture and reserved pork broth to shortening, beating well after each addition. (Add just enough broth to make a thick, creamy paste).

To assemble each tamale, spread 2 Tbsps. of the masa mixture on the center of the corn husk.  Place about 1 Tbsp. meat mixture in the middle of the masa. 


Fold in sides of husk and fold up the bottom.   Note: I used Alton Brown's suggestion to bundle the tamales in groups of three and tie with kitchen twine.


Place a mound of extra husks or a foil ball in the center of a steamer basket placed in a large steamer pot.  Lean the tamale bundles in the basket, open side up.  Add water to steamer pot just below the basket.  Bring water to boil and reduce heat to low.  Cover and steam until the dough is firm and pulls away easily from the husk, 1 to 1 1/2 hours.


Red Sauce


Ingredients
6 large dried chilies ( such as Ancho for mild or Anaheim for hotter sauce)
2 garlic cloves
1 teaspoons ground cumin
½ teaspoon salt

Directions
Remove stems and seeds from dried chili peppers.  Place peppers in a single layer on a baking sheet.  Roast in 350°F oven for 2 to 5 minutes or until you smell a sweet roasted aroma, checking often to avoid burning. Remove from oven and soak in enough hot water to cover for about 30 minutes or until cool. Put peppers and 1 1/4 cups of the soaking water into a blender (save the remaining soaking water).  Add garlic, cumin and salt. Cover and blend until smooth.  If sauce appears too thick to blend add a little more soaking water.

Wednesday, November 11, 2015

Cilantro Lime Rice

My youngest loves Chipotle.  It's not because of their burritos, tacos, or quesadillas, it's because of their rice.  I think he could eat his body weight in it if we allowed him to do so.  He's not a huge fan of Mexican food so I make this side dish to help convince him to eat whatever the main course is that day.


Printable Recipe

Ingredients
1 cup uncooked long-grain white rice
1 Tbsp. butter
1 cloves garlic, minced
2  tsps. freshly squeezed lime juice
2 cups chicken broth
1 Tbsp. freshly squeezed lime juice
2 tsps. granulated sugar
2 Tbsps. fresh chopped cilantro
Directions
In a saucepan, melt butter over medium-high heat. Add rice and sauté for 1-2 minutes until the rice is nicely coated. Add the garlic and sauté for an additional minute. Add 2 tsps. of lime juice and chicken broth. Bring to a boil. Reduce heat to low, cover and cook 20 minutes, or until rice is tender and all the broth is absorbed. Remove from heat. In a small bowl, whisk together additional 1 Tbsp. lime juice, sugar, and cilantro.  Pour over rice and stir to mix.

Teriyaki Boneless Chicken Breasts

Today was a very busy day at work so I decided to make another quick and easy meal on the grill.  This time it was teriyaki grilled chicken breasts for a light and delicious dinner.


I pregeated the grill to 325° and while I waited, I pounded the chicken breasts to ensure all were about the same thickness to make cook times faster.  Then I sprinkled both sides of the chicken with Simply Asia Sweet Ginger Garlic seasoning.  


Once the grill reached temperature, I put the chicken breasts on to cook.  I grilled for 10 minutes on the first side, then flipped and continued to cook until the chicken was cooked through.  Near the end of cooking, I brushed the teriyaki glaze onto each side.


Ingredients:
4 Boneless, Skinless Chicken Breasts
1 Tbsp Simply Asia Sweet Ginger Garlic seasoning
2 Tbsp. Kikkoman Teriyaki Baste and Glaze


Directions:
Preheat grill to 325°.  Sprinkle both sides of chicken with ginger garlic seasoning.  Grill chicken 8-10 minutes per side or until cooked through.  Brush with Teriyaki glaze the last 5-7 minutes.

Monday, November 9, 2015

White Chicken Chili

When the weather starts to turn cold, I immediately start thinking of warm bowls of soup and chili.  My family is not a huge fan of traditional chili, but they really enjoy this recipe.  You can adjust the spice level to please almost any crowd and it's a nice hearty meal when served with corn muffins.  I hope you enjoy!


Printable Recipe

Ingredients
2 (16-oz) cans navy beans, drained
1 onion, finely diced
1 stick butter
¼ cup all purpose flour
1 can chicken broth (low sodium)
2 cups half-n-half
1 tsp. Tabasco sauce
1 ½ tsp. chili powder
1 tsp. ground cumin
½ tsp. salt
½ tsp. white pepper
1 (4-oz) can chopped green chilies, drained
2 cups chicken, cooked and shredded
1 cup shredded Monterey Jack or Mexican Blend Cheese

Directions
In a Dutch oven, cook onion in melted butter until softened over low heat.  Adjust heat to medium and whisk in flour.  Cook roux for 3 minutes, whisking often.  Gradually add broth and half-n-half, whisking constantly.  Bring mixture to a boil and simmer, stirring often, for 5 minutes or until thickened.  Stir in Tabasco, chili powder, cumin, salt, and white pepper. Add beans, chilies, chicken, and cheese and cook over low heat, stirring occasionally, for 20 minutes.

Saturday, October 31, 2015

Oven Roasted Spatchcock Chicken

Sometimes I end up trying a recipe out of necessity.  In this case, it's a rainy day and I am in the mood for White Chicken Chili.  I headed out to the grocery store for a rotisserie chicken, but could not bring myself to pay $7.99.  Luckily they had their whole chickens on sale so I could buy an uncooked whole bird for less than half the price of the cooked one.  I opted to roast my own and then make my own broth which would also go into the Chili.

I have never spatchcocked a chicken before but plan to try spatchcock and smoke my Thanksgiving turkey so I figured it's always good to practice.  I must admit, the result was the juiciest roasted chicken I have ever had.  Definitely going this route with my turkey next month!


Printable Recipe

Ingredients
1 Whole chicken
Kosher salt
Black Pepper
Olive Oil

Directions
Preheat oven to 425°F. Place the chicken on a cutting board breast side down with the drumsticks facing you. Using kitchen shears, cut on both side of the backbone to remove it. Turn chicken over and press down firmly to flatten.

Rub the chicken liberally with olive oil then sprinkle with salt and pepper. Place on a baking sheet or in a roasting pan and cook until it registers 165°F on an instant-read thermometer inserted in the thickest part of the thigh and the breast.  Allow to rest a few minutes before carving.

Sunday, October 25, 2015

Apple Dumplings

I love this dessert because it is simple and tastes great.  Best of all, you can use fresh peaches instead of apples and get awesome results.  If you have a smaller family to feed, simply make half the recipe.


Printable Recipe

Ingredients
2 cans crescent rolls
2 Granny Smith Apples
2 sticks butter
¼ cup Sugar
1 tsp cinnamon
1 can Mountain Dew or Sprite
2 Tbsps. Vanilla

Directions
Preheat oven to 350⁰F. Peel apples and cut into 8 slices per apple. Roll one slice of apple in each crescent roll. Place in greased 9x13 baking dish.


In a saucepan, melt butter; add sugar and vanilla and mix well.  Cook mixture just until all sugar has dissolved.   Pour over dumplings. Sprinkle cinnamon over the crescent rolls. Pour Sprite/Mountain Dew around the edges. Bake 35-40 minutes or until golden brown.


Saturday, October 24, 2015

Crockpot Smokehouse Beans

I'm always on the lookout for good side dish recipes I can prepare with my BBQ dishes.  This is a recipe I came up with after looking for alternatives to baked beans.  This recipe resembles one for pinto beans with ham hocks, but uses chopped brisket instead of ham and a little different spice combination.  Enjoy!


Printable Recipe

Ingredients
1 pound dried pinto beans, picked over and rinsed
1 cup chopped brisket
1 Tbsp. chili powder
1 Tbsp. salt
½ Tbsp. black pepper
½ Tbsp. onion powder
½ Tbsp. garlic powder
¼ tsp. ground cumin

Directions
Soak beans as directed on package. Drain.

When you are ready to cook the bean, add all the ingredients to a crockpot and cook on low for 7-8 hours or high for 4-5 hours or until the beans are tender.

Thursday, October 22, 2015

All Purpose BBQ Sauce

This is a good all-purpose BBQ sauce that brings a hint of smoky and a little taste of sweet. You can easily adapt it to add more of the specific flavor you prefer but it works well as a sauce you can serve with any kind of BBQ.


Printable Recipe

Ingredients
1 ¾ cups ketchup
⅔ cup water
⅓ cup cider vinegar
⅓ cup white vinegar
⅓ cup brown sugar
2 ½ Tbsps. Worcestershire sauce
1 Tbsp. chili powder
1 Tbsp. ground cumin
1½ tsps. kosher salt
1½ tsps. black pepper

Directions
Combine all of the ingredients in a saucepan and warm over medium-low heat, stirring occasionally.  Simmer for about 5 minutes, then remove from heat to cool. After cooling, transfer the sauce to desired storage container and store in the refrigerator.

Texas Smoked Brisket

This is a no-frills, simple brisket recipe that delivers solid results.  There is much debate about things like cooking in a foil pan vs directly on the grate, wrapping in foil at 165⁰, etc. so feel free to research and go with your preferred methods.  I prefer to start my brisket on a rack set inside a pan to catch the drippings and wrap in foil at 165⁰to speed up the cooking process.  Enjoy!


Printable Recipe

Ingredients
1 packers cut brisket (10-14 lbs)
¼ cup kosher salt
¼ cup ground pepper
Apple Juice or other liquid for spritzing


Directions
Trim brisket's fat cap to about 1/4" and do any additional trimming that you prefer.  Mix salt and pepper in a small bowl and stir to blend.  Apply the salt/pepper rub to brisket making sure to cover all surfaces.  Allow brisket to come to room temperature while smoker preheats to 225⁰F. 

Place brisket on smoker far side up.  If you prefer you can place the brisket on a rack inside a foil pan or you can place it directly on the smoker grate.

After 3 hours, spritz brisket with apple juice or other liquid (in a spray bottle) about once every 30 minutes, if needed.  When the brisket reaches an internal temperature of 165⁰F, remove it from the smoker and wrap tightly in foil.  Return to the smoker and continue to cook until it reaches between 195⁰-205⁰F.  Remove from the smoker and allow the wrapped brisket to rest for one to two hours before slicing.  I wrapped the foil covered brisket in towels and place in a cooler to rest.


Mozzarella Stuffed Meatballs

I was introduced to this recipe at our church small group (Thanks Amy!) and had to give it a try.  It was a hit with the entire family so I adjusted the ingredients to make more and here it is.  You can serve these as appetizers, as the main dish in a meal, or have spaghetti with cheesy meatballs.    The original recipe can be found here.  That recipe called for these to be cooked in a crockpot so you can find the alternate cooking option at the bottom.


Printable Recipe

Ingredients
1 ½ pound ground beef
1 cup bread crumbs
2 eggs
2 teaspoons garlic powder
1 teaspoon onion powder
1 tablespoon Italian seasoning
1 teaspoon salt
½ teaspoon black pepper
3 mozzarella string cheese sticks
Marinara sauce for dipping

Directions (Oven)
Cut each cheese stick into 6 equal pieces. Place in a small bowl and chill until ready to use.  Preheat oven to 400 degrees.

In a large bowl, combine ground beef, bread crumbs, eggs, garlic powder, onion powder, Italian seasoning, salt and pepper. Mix the ingredients with your hands until well blended.

To form meatballs, take 4 tablespoons of  the meat mixture and roll into a ball. Gently push a piece of chilled mozzarella into the middle of each meatball and close the meat around the cheese. Make sure the meat completely covers the cheese. Place on a rimmed baking pan lined with foil or a Silpat.  This should make about 18 meatballs.  Bake for 15-20 minutes until meatballs are browned and cheese is melted.

Alternate cooking directions for Crockpot
Place meatballs in the crockpot, cover and cook on high for 1-2 hours or on low 3-4 hours until meat it cooked through (no longer pink).

Wednesday, October 21, 2015

Strawberry Ice Cream

This is a simple recipe for strawberry ice cream.  I like to use fresh strawberries but frozen will also work well.  This recipe requires no cooking and just a little mixing.  That means you'll have more time to relax and wait for the sweet results.


Printable Recipe

Ingredients
1½ cups fresh strawberries
¾ cup whole milk
⅔ cup granulated sugar
pinch salt
1½ cups heavy cream
1½ tsp. vanilla extract

Directions
Place the strawberries into the bowl of a food processor and pulse strawberries until rough chopped. Set aside.

In a medium bowl, use a hand mixer on low speed to combine the milk, sugar and salt until the sugar is dissolved. Stir in the heavy cream and vanilla. Add the reserved strawberries with all juices and stir to combine. Cover and refrigerate several hours or overnight.

Churn in an ice cream machine according to manufacturer’s directions. Serve immediately, or place in freezer for an hour or two for a firmer texture.

Friday, October 16, 2015

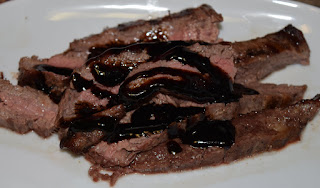
Balsamic Flank Steak

This is a simple recipe that can be cooked indoors in a skillet or grill pan or outside on the grill.  The Balsamic reduction makes a nice sauce and gives it a great flavor boost.  Be aware that the vinegar reduction process can get messy if your skillet is too small.


Printable Recipe

Ingredients
1 ½ lbs. flank steak (cut into 2 pieces, if desired)
1 cup balsamic vinegar

Directions
If cooking indoors in a skillet, heat one tablespoon oil in a large skillet over high. Season steak with salt and pepper and place in the skillet. Cook, turning once, 6 to 8 minutes total for medium-rare. If grilling: Grill the steak for 1 to 2 minutes per side over direct heat, then move to a cooler section of the grill and continue to cook until desired internal temperature is reached.  Check for doneness with an instant-read thermometer (125°F for rare, 130-135°F for medium rare, and 135-140°F for medium). 

Transfer to a plate, cover loosely with foil, and allow to rest 5 to 10 minutes.  Add vinegar to the  skillet and stir to scrap any brown bits from the bottom of the pan.  Boil over medium-high until reduced to ½ cup, then stir in any juices from resting steak. Slice steak, and serve with vinegar reduction.

Thursday, October 15, 2015

Crockpot Swiss Steak

This is a recipe that quickly reminds me of my childhood.  My grandmother and mom both made this recipe and it is one of my favorites.  This is a dish that I have to pair with mashed potatoes and macaroni and cheese.  For me, it's not an option to have it any other way but feel free to choose your favorite sides ;-)


Printable Recipe

Ingredients
1½-2 lbs. cube steak
½ cup flour
¼ cup cooking oil
½ onion, chopped
½ green bell pepper, chopped
1 Tbsp. Worcestershire sauce
Salt & pepper to taste
1 large can crushed tomatoes

Directions
Coat cube steak pieces in flour and season with salt and pepper.  Heat oil in frying pan over medium-high heat and brown meat on both sides.  Place in crockpot.  Lightly brown onions and peppers in pan and add to crockpot.  Add Worcestershire sauce and tomatoes and cook on low for 5-6 hrs. until tender.

Wednesday, October 14, 2015

Crockpot Pot Roast

This recipe takes a little longer to get started but the results don't disappoint. The gravy adds a lot of flavor to the dish and it's worth the time and effort.  If you are close to your crockpot while this is cooking you can add the veggies later in the cooking process.  I usually add mine after about 3 hrs. of cooking on low so they can cook the last 5 hrs. with the meat.


Printable Recipe

Ingredients
One beef chuck roast
⅓ cup all-purpose flour, plus more for coating
2 Tbsps. olive oil
5-6 white potatoes, cut into ½" wedges
4 medium carrots, cut into 2" pieces
3 stalks celery, peeled and cut into 2" pieces
1 medium onion, cut into ½" wedges
2 cloves garlic, minced
3 Tbsps. tomato paste
1 cup red wine
2 cups low-sodium beef broth
2 bay leaves
1 tsp. thyme
Salt and pepper

Directions
Season the roast all over with salt and pepper. Coat in flour and shake off any excess. Heat 2 tablespoons of the oil in a large nonstick skillet over medium-high heat. Add the roast and cook until golden brown on all sides. Place the roast in the crockpot and add the potatoes, carrots, celery, onions and garlic.

Using the same skillet, add the tomato paste and whisk until the oil begins to turn brick-red, about 1 minute. Add the flour and wine and whisk until thick. Add the beef broth, bay leaves, thyme,  1/2 teaspoon salt and a few grinds of pepper and bring to a simmer, whisking, until the gravy is smooth and thickens slightly, about 4 minutes.

Pour the gravy into the crockpot over the meat and vegetables. Cover and cook on low for 8 hours. Place the meat and vegetables on a platter, moistening them with some of the gravy and serve the remaining gravy on the side.


This recipe was adapted from the Food Network.


Thursday, October 8, 2015

Ronnie's Crockpot Pulled Pork

This recipe was sent to me by my friend Ronnie.  He's perfected the recipe over the years and shared it with me as an alternative to firing up the smoker.  This is a great crockpot recipe and could not be easier to make.  The end result was tender and juicy pulled pork which pleased the entire family.  Ronnie can be found on Twitter at @iHeartMalware.


Printable recipe

Ingredients
1 Boston pork butt or shoulder
Memphis Dust Rub 
6 oz Yuengling or other beer (or sub chicken broth)
6 oz apple cider vinegar
BBQ Sauce
Liquid smoke

Directions
In the crockpot, rub the pork with the dry rub, and place fat-side up. Next, add the beer and apple cider vinegar to the crockpot, putting equal parts on each side of the meat.  Sprinkle with liquid smoke. Cook on low for 8 hours.

After 8 hours, remove the pork from the crockpot, remove any bone or fat, and shred remaining meat. Reserve ¼ cup of the juice from cooking, empty the crock pot, then add the meat back in and toss with the reserved juice.

If you want the same sauce on all the meat,  add ¼ cup of bbq sauce and ¼ cup of apple cider vinegar. Replace crockpot lid and warm for 30 minutes. Note:  You can also add bbq sauce as you serve if each person prefers a different sauce.

I chose to add my favorite sauce as I served the meat and made sliders using King's Hawaiian rolls.  Yum!

Thanks Ronnie!!